Here is a simple guide on how to add plugins to Garageband. This guide also covers how to use plugins and troubleshoot common problems.
GarageBand is a free and easy-to-use digital audio workstation packed with professional features. To make the program even better, you can add free and paid 3rd party plugins to add more functionality and sounds to the software.
Even better, the internet is packed with free VST plugins and Audio Unit Plugins for Mac to add more sounds and effects to your music production setup.
There are two types of plugins that you can add to Garageband.
- Virtual Instrument Plugins such as strings, pianos, guitars, and more.
- Audio Effects include reverb, delay, autotune, and more.
There are tons of free plugins online: 50 Best Free Mac VST Plugins
So let’s get started with how to install and use plugins in Garageband.
At the time of this tutorial, I am using macOS Monterey 12.6.1 and Garageband Version 10.4.7.
- How to Install Plugins ( Summary )
- How to Add Plugins Into GarageBand
- How to Use Plugins in Garageband
- Troubleshooting Tips
How to Install Plugins into Garageband ( Summary )
This is a summary of the plugin installation process.
- To install a plugin in Garageband, copy the plugin .component file to Finder > Macintosh HD > Library > Audio > Plugins > Components.
- Restart your computer.
- Open Garageband and add a new “Software Instrument” track.
- Select the virtual instrument you added.
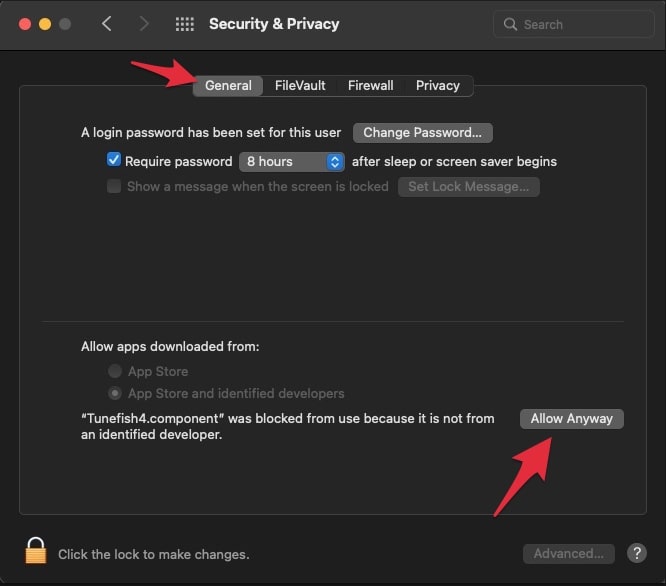
- A security alert may appear. Go to Apple Preferences > Security & Privacy, click “Allow Anyway” and re-add the instrument in Garageband.
Related: Best Free Garageband Plugins
How to Add Plugins to Garageband
Installing plugins into GarageBand is a simple process. Just follow the steps below.
Important: You will need to restart your computer for new plugins to appear in Garageband.
Step-by-Step Instructions
1. Download the plugin you want to install. Related: 50 Free Mac VST Plugins
2. Unzip the zip file.
3. Open “Finder” and go to New Finder Window > Macintosh HD > Library > Audio > Plug-ins
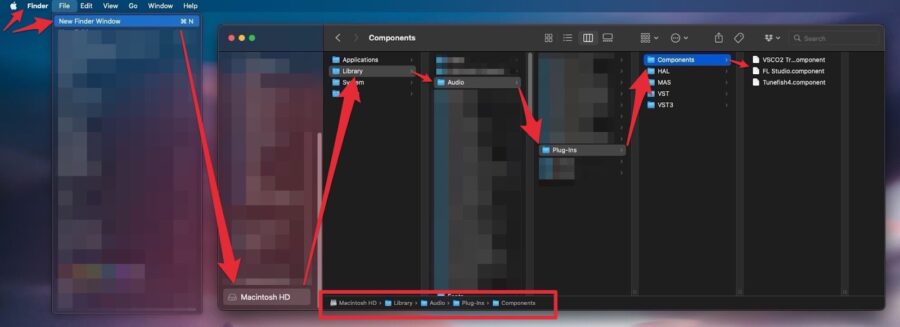
4. Drag the .component file into the Components folder.
- If the file ends with .vst, drag it to the VST folder.
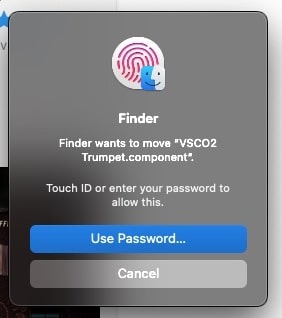
5. Enter your password to approve adding the new file to the folder.
6. Restart your computer.
7. Open Garageband.
8. In Garageband click the “+” icon to add a new track.
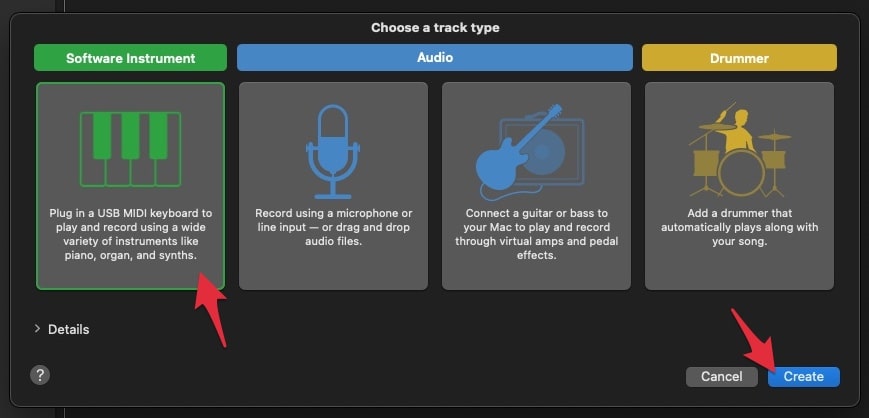
9. Select “Software Instrument” and click the “Create” button.
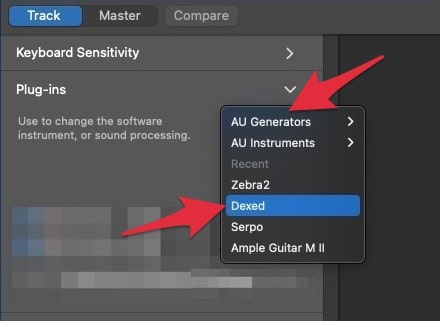
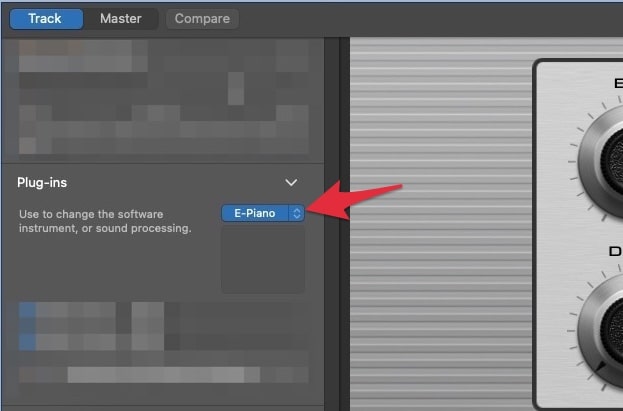
10. In the Smart Controls window, toggle open “Plug-ins”, and click the arrows next to the instrument name.
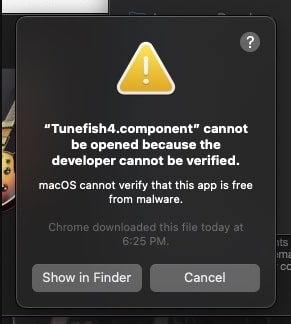
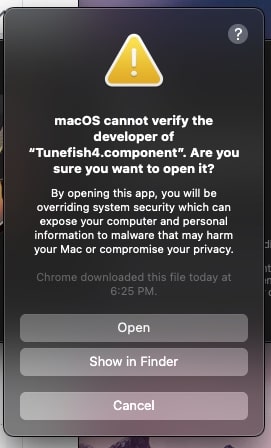
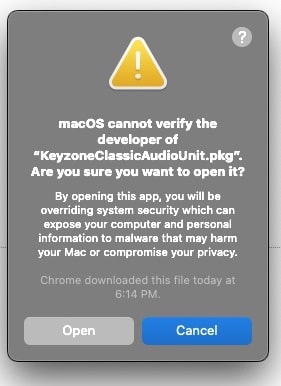
11. You may get a warning saying the plugin cannot be opened because the developer cannot be verified. Click cancel.
12. To approve the plugin to use:
- Click the Apple icon at the top left of your computer.
- Click System Preferences > Security & Privacy > General
- Click “Allow Anyway.”
- Close the pop-up window.
13. In Garageband, select the virtual instrument in the dropdown menu again.
14. You may get another alert message. Click the “Open” button to allow the program to use the plugin.
15. Play the instrument with your mouse, keyboard, or MIDI controller.
How to Use Plugins in Garageband
These are the steps to add a virtual instrument track to your music projects, such as synths, guitars, pianos, and more.
1. In Garageband click the “+” icon to add a new track.
2. Select “Software Instrument” and click the “Create” button.
3. Click the track you want to edit.
4. In the Smart Controls window, toggle open “Plug-ins”, and click the arrows next to the instrument name.
5. In the dropdown, select the plugin you want to use.
6. Play the instrument with your mouse, keyboard, or MIDI controller.
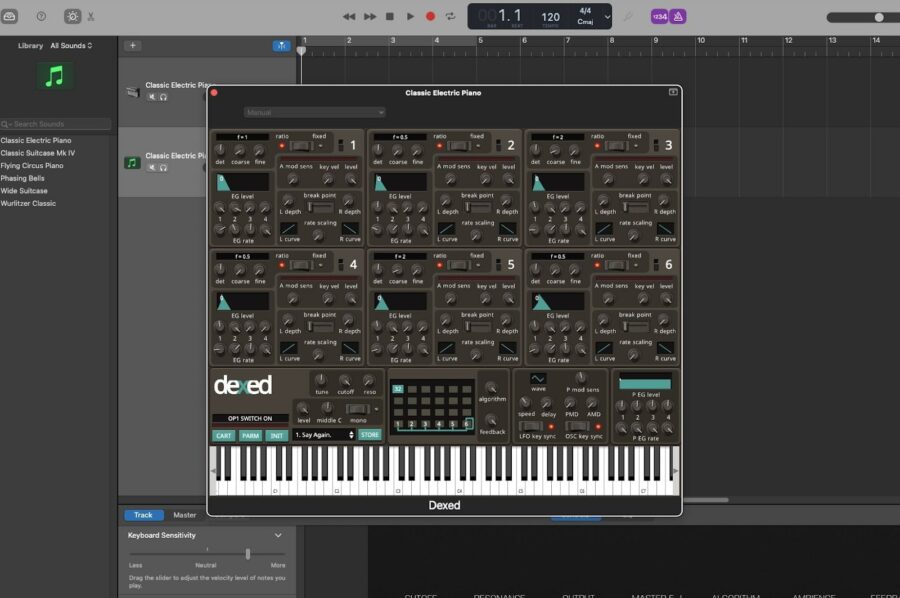
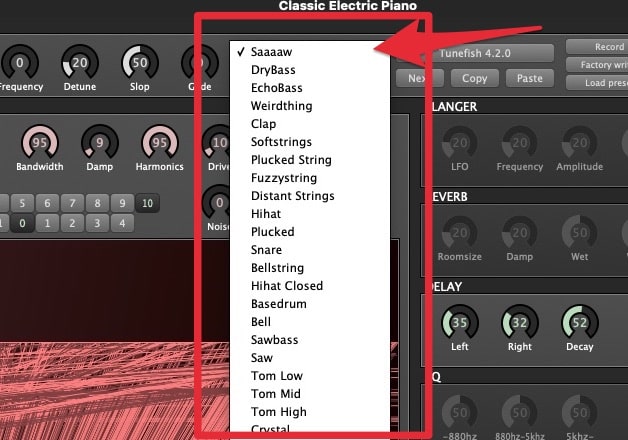
Switching Sounds: If a plugin has multiple sounds or audio presets, you will see a dropdown menu to select the sounds.
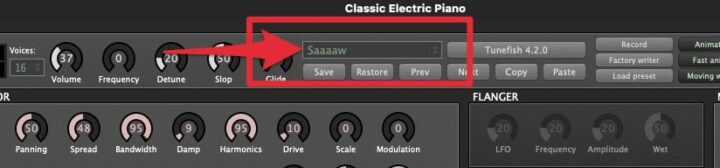
Click the dropdown menu arrows to view the available sounds.
Troubleshooting Tips
New Plugins Don’t Appear in Garageband
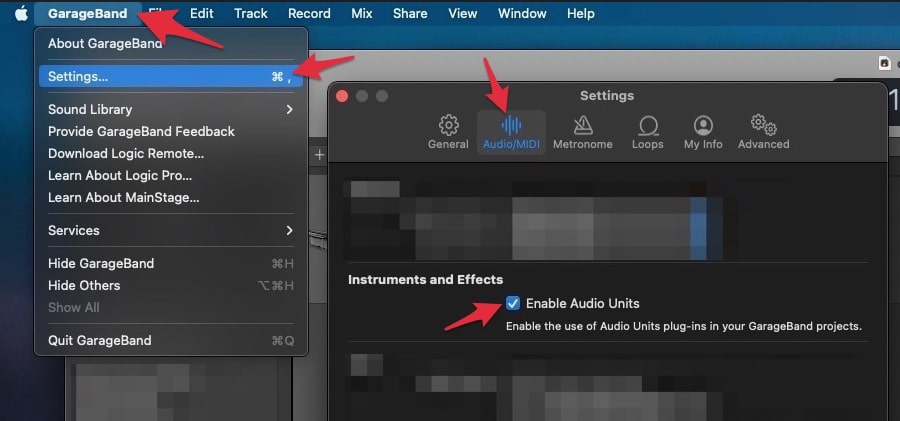
If you are sure you added the plugin to the correct folder and restarted your computer, but the plugin still does not appear in Garageband. You want to make certain “Audio Units” is enabled in Garageband.
- In Garageband click “Garageband > Settings”
- Click Audio / MIDI.
- Check Enable Audio Units.
- Restart Garageband.
- Try to add the virtual instrument again.
2. Installing PKG Files
If you attempt to install a PKG or DMG file, you may get a message that says, Unidentified Developer.
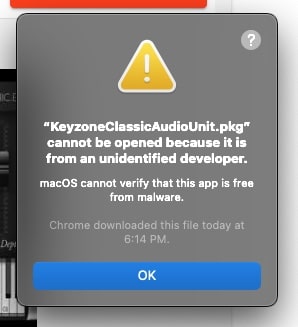
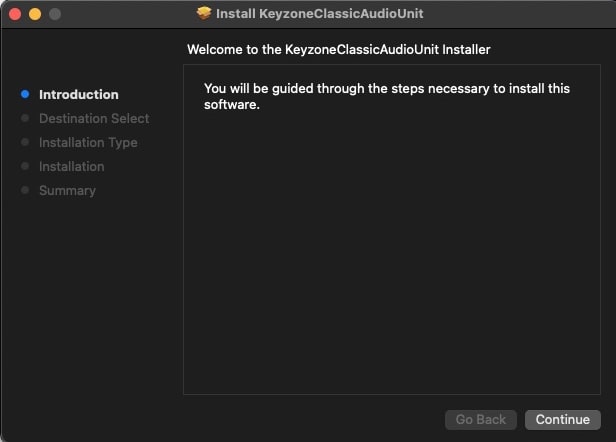
1. If you want to proceed with installing the plugin, hold CTRL on your computer keyboard and click the PKG file to open the plugin installer file.
2. Follow the installation process.
3. Restart your computer.
4. Open Garageband.
5. In Garageband click the “+” icon to add a new track.
6. Select “Software Instrument” and click the “Create” button.
7. In the Smart Controls window, toggle open “Plug-ins”, and click the arrows next to the instrument name.
8. Play the instrument with your mouse, keyboard, or MIDI controller.
Why Are My Plugins Not Showing up In GarageBand?
If the new plugins aren’t showing, try troubleshooting to help figure out the problem.
- Wrong Type of Plugin – GarageBand can only use a certain type of plugin called Audio Units (AU). So, if you downloaded a plugin that’s not AU, it won’t show up in GarageBand. Make sure your plugins are the right type!
- The Plugin Is Not Installed Correctly – If a plugin isn’t installed properly, GarageBand won’t be able to find it. It’s like trying to find a book in a library, but the book hasn’t been put on the shelf. It’s important to ensure that you correctly follow the installation process.
- Outdated Software: If either GarageBand or the plugin is not updated to the latest version, this could also cause some hiccups. It’s like trying to put a brand-new game into an old game console. Sometimes, they’re just not compatible. So, keep your GarageBand and plugins updated!
- The Plugin Is Not Enabled – Sometimes, even if the plugin is installed correctly, you might have to turn it on inside GarageBand manually. Look in your GarageBand preferences to make sure your plugins are enabled.
- Garage Band Hasn’t Scanned for New Plugins – If you’ve installed a new plugin, GarageBand might not know it’s there until it does a “scan” for new plugins. You might need to restart the GarageBand app or your computer to make this happen.
Can You Add 3rd Party Plugins to Garage Band?
The short answer is yes, you totally can!
To break it down a bit more: 3rd party plugins are like extra special effects or instruments that aren’t included with GarageBand when you first download it. Think of them like extra toppings on a pizza. GarageBand comes with its own toppings, but you can also add more if you want.
The plugins made by other companies (hence the term “3rd party”) can add some really cool features to your music. However, there’s a catch. Not every plugin will work with GarageBand. GarageBand only works with plugins of a specific type, called Audio Units or AU. So make sure you’re downloading AU plugins.
Installing these plugins is like adding a new game to your game console. You’ll have to download it, then follow the installation instructions, and finally, you can start playing.
Once installed, you might need to enable the plugin in GarageBand. It’s kind of like turning on a new toy for the first time – you might need to flip a switch or press a button.
Finally, you might have to restart GarageBand or even your computer for GarageBand to recognize the new plugin.
So, in short, yes, you can totally add 3rd party plugins to GarageBand! Just make sure they’re AU plugins, and follow the installation and enabling instructions.
What Is The Difference Between VST Plugins & Audio Units?
VST stands for Virtual Studio Technology. You can use These little digital tools to make your music sound different or better. They’re like the effects pedal for a guitar but for your computer. Steinberg invented VST plugins, and they are used mostly with Windows and some Mac digital audio workstation apps.
On the other hand, Audio Units are the Apple version of VST plugins, and Apple created them for their own music software, like GarageBand and Logic Pro. If you’re using a Mac for your music, then you might use Audio Units instead of VSTs.
Now, you might be wondering, “What’s the difference? Aren’t they both just digital music tools?” And you’re right. They both are. But there are some key differences.
One of the main differences is compatibility. As mentioned earlier, VST plugins work mostly with Windows and some Mac software, while Audio Units are only for Apple. That means if you’re using a Windows computer, you’ll probably use VSTs. If you’re using a Mac, you can use either, but Audio Units might work better because Apple designs them.
Also, the way they are designed is slightly different. VSTs can be used for many different things like instruments, effects, or even video. On the other hand, Audio Units are mostly just for musical effects and instruments.
So, in summary, VST plugins and Audio Units are both really cool digital music tools, but they are used on different computers and in slightly different ways. Think of it like picking out a bicycle: both mountain bikes and road bikes will get you from point A to point B, but they’re designed for different terrains. The same goes for VST plugins and Audio Units.
In conclusion, incorporating GarageBand plugins into your music production process can really enhance your sounds. These plugins in GarageBand, which come in both free and paid versions, offer a variety of features to cater to every musician’s needs. They may be in the form of virtual instruments, effect plugins, or instrument plugins.
Many popular music plugins, including those from third-party vendors, are available in both VST and Mac AU versions. To install these, you need to download them first, then navigate to the plugins area in GarageBand to add them to your library. Remember, though, always ensure your plugins are compatible with your Mac before installing them to avoid any issues.
The beauty of Garageband iOS is the vast selection of both free and paid plugins that you can add to your music projects.
Always stay updated with new plugins to keep your sounds fresh and innovative. Whether you’re using free plugins, paid plugins, or a mix of both, the potential for creativity is endless!
I hope that you found this article helpful with installing plugins in Garageband.
Related: How to Use Garageband | How to Install VST Plugins