Free video course on How to Create a Beat Selling Website using WordPress in under 3 hours.
What You Will Learn:
- Create a WordPress Website
- Set Up a FREE Domain Address *
- Create an Online Beat Store
- Customize Website Appearance
- 10 Tips to Sell Your First Beat
- Get $15 Off the Music Maker Template *
What’s Included

Course Summary
This course contains 1 hour of free video tutorials. If you follow each video you can have a beat selling website up today!
Take action on your dreams and start an online business!
Table of Contents
- Course Summary
- 11 Reasons You Need a Website
- 1. Set Up Hosting & Domain Address
- 2. Get the WordPress Theme
- 3. Install Theme & Demo Content
- 4. Update Backend & Payment Settings
- 5. Keep It Simple!
- 6. Customize the Homepage
- 7. Beat Player Appearance
- 8. Slider Banners
- 9. Add First Beat
- 10. Pricing Table
- 11. Testimonials
- 12. Add Static Pages
- 13. Find Tutorials & Frequently Asked Questions
- 14. What to Do Next
- 15. SSL Certificate (Optional)
- 10 Tips to Sell Your First Beat
- Common Setup Issues
What You Need to Get Started
Creating a website doesn’t have to be complicated or cost a lot of money. Here are the basics you need to create a website:
- Domain Name – This is the web address people type to visit your website.
- Website Host – This is an online server where your website is stored 24/7.
- WordPress – WordPress is the world’s most popular free blogging software.
- Website Theme – A WordPress theme is the layout and appearance of your website.
With the right website host, you can get a FREE domain name, easy WordPress install, and free WordPress themes.
Common Website Frequently Asked Questions
- View 20+ Pre-sale Frequently Asked Questions
- What is the Music Maker Theme?
- What Do I Need to Use the Theme?
- What is WordPress?
- How Do I Use The WordPress Software?
- What is a Website Host?
- Is this a monthly fee or a one-time fee?
- Is website hosting included?
- How do you provide support?
What If I Already Have a Website Host?
If you already have a website host you can skip the get a website host section. Unfortunately, you are not eligible for the $15 discount.
This course contains affiliate links. By using our affiliate link you will receive a theme discount.
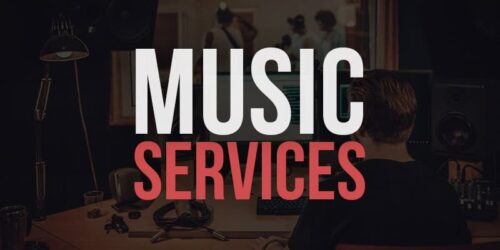
11 Reasons You Need a Website
Learn why a website is essential for success and how it will help you make money.
- Build an Online Brand
- Promote Music Services
- Have More Ways to Make Money
- Build Credibility & Trust
- Get Search Engine Traffic
- More Flexibility & Control
- Unlimited Content
Ways to Make Money Online
All successful businesses have websites. It opens up many opportunities to make money. Here are a few examples:
- Sell Beats & Music
- Sell Products ( Digital & Physical )
- Offer Music Services
- Affiliate marketing
- Sell Background Music
- Sell Advertising Spots
- Membership Site and more
1. Set Up Hosting & Domain Address
Bluehost is the #1 website host suggested by WordPress, with over 2 million customers.
- Get 1 Free Domain Address
- 30 Day Money Back Guarantee
- 50GB Storage / Unlimited Bandwidth
- Easy WordPress Install
- 24/7 Customer Support
Step-by-Step Instructions
Please note: This toggle may close when you click inside it.
- Click Here to visit the Bluehost Homepage!
- On the homepage click Get Started Now.
- Select the plan you want.
- Domain Address Options:
- Create a New Domain Address.
- Transfer an Existing Domain Address.
- Select a domain address later by clicking I’ll create my domain later.
- Checkout Page
- Enter your details.
- Under Package Information adjust the Account Plan if needed.
- Enter payment information.
- Read the terms & conditions.
- Click Submit.
- Download Receipt to save a copy of your payment.
- Click Create Your Account.
- Enter a Password, check the checkbox, and click Create Account. ( Save Your Password )
- Push Go to Login.
- Enter Email & Password and click Login.
- Click Skip this step 4 times.
- Push Launch My Site to remove the coming soon page.
- Click Launch myself anyway.
- Push WordPress.
- Click Plugins.
- Check the Checkbox.
- Click Deactivate, then Apply.
- Go to the next section below.
Common Hosting Questions
- View 20+ Pre-sale Frequently Asked Questions
- What is the Music Maker Theme?
- What Do I Need to Use the Theme?
- What is WordPress?
- How Do I Use The WordPress Software?
- What is a Website Host?
- Is this a monthly fee or a one-time fee?
- Is website hosting included?
- How do you provide support?
Bluehost Frequently Asked Questions
- How To Login To WordPress Sites – WP Admin Access
- Free SSL Certificate – Free Wordpress SSL Setup
- WordPress: Adding Images
- 9 Tips for Working in WordPress
What If I Already Have a Website Host?
If you already have a website host you can jump to the next section.
2. Get the WordPress Theme
The Music Maker WordPress Theme is a powerful website template that allows you to sell beats, music, loops, products, and more.
Theme Features
- Sell Beats
- Sell digital and physical products
- Add unlimited pages and blog posts
- Add WordPress plugins to add extra features
- Includes 90 FREE Music Graphics
- Instant Beat Downloads
- Mobile Responsive
- Create Discounts & Coupons
- Track Beat Plays
- SEO Friendly
- Capture Emails
- $15 Off the Website Template
Additional Info ( 4 )
Step-by-Step Instructions
- Visit MusicMakerTheme.com
- Click the Buy Now button.
- Push Get it Now button.
- Enter your details and pay.
- Download all the files to your computer.
- Save your license key number.
- Submit Info to Get $15 Discount.
3. Install Theme & Demo Content
Here you will install the Music Maker theme, demo content, and demo style.
This process takes around 5 minutes.
Upload the MusicMaker.zip file.
Do not unzip the file.
Step-by-Step Instructions
Here you will install the theme and demo content. Upload the MusicMaker.zip file. Do not unzip this file.
1. Install the Music Maker Theme
- Click Themes under Appearance.
- Click Add New.
- Click Upload Theme.
- Click Choose File and select the MusicMaker.zip file on your computer.
- Click Install Now.
- Click Activate.
2. Activate License & Import Sample Content
- Click Get Started in the green alert message.
- Click Get Started on the Welcome page.
- Enter your license key in the input.
- Click Activate. If you have issues, click Later.
- Click Install – This can take 45 Seconds to update.
- Click Import – This can take over a minute to import.
- Click Import Demo Style.
3. Import Demo Style
- Click the Preview button to view the demo style.
- Click Import to import one of the demo styles.
- Only import 1 demo style or the second imported style may not match the demo website.
How to Switch to Another Demo Style
Help Links ( 2 )
4. Update Backend & Payment Settings
Here you will update a few plugins and payment settings. Pause the video if needed.
This process takes around 8 minutes.
Link: Download Demo Assets
Step-by-Step Instructions ( 9 )
1. Update Permalinks
- Click Update Permalinks on the getting started page.
- Select Post Name.
- Click Save Changes.
- Close the browser tab.
2. Update Checkout Pages
- Click Checkout Pages on the getting started page.
- Check the following:
- Checkout
- Purchase Confirmation
- Purchase History
- Transaction Failed
- In the dropdown above select Edit and click Apply.
- Under Template select Full Width and Update.
- Close the browser tab.
3. Shopping Menu Menu
- Click Shopping Menu on the getting started page.
- Select the menu: Main Navigation Menu
- Check Always display cart. ( Optional )
- Select Align Right. ( Optional )
- Click Save Changes.
- Close the browser tab.
Getting an Error? Sorry, you are not allowed to access this page error.
4. Testimonial Slider View
- Click Testimonial Slider View on the getting started page.
- Under Mode click Slideshow.
- Navigation Controls: “Sides: Previous/Next“.
- Uncheck “Title”.
- Under Template select Modern.
- Click Save Changes.
- Close the browser tab.
Getting an error? Sorry, you are not allowed to access this page error.
5. Update Contact Forms
- Click the Update Contact Forms on the get started page.
- Click the “Contact form” in the table.
- Optional: Edit the text next to “label”. If you make changes, click the Save button.
- Click the “Mail” tab.
- Add your email address to the “To” input.
- Optional: Add your info to the “From” input and edit the Subject input.
- Click the Save button.
- Click Contact Forms on the sidebar.
- Click the “Make an Offer” form in the table.
- Optional: Edit the text next to “label”. If you make changes, click the Save button.
- Click the “Mail” tab.
- Add your email address to the “To” input.
- Optional: Add your info to the “From” input and edit the Subject input.
- Click the Save button.
- Close the browser tab.
6. Download the Demo Assets
- Visit Link: Download Demo Assets.
- Download the files next to the demo style you installed.
- Download the Assets & Store Settings next to the demo you installed.
- Then unzip the folder.
- There may be many files for a demo style, download them all.
7. Import Slider Banners
- Click Import Slider Banners on the get started page.
- Click Go to Dashboard.
- Click New Project.
- Click the Import Your Own Files text link
- Enable Restore Slider
- Click the + under Upload File
- Select the .ss3 file on your computer that you downloaded in the Demo Download Assets folder.
- Click the Import button.
- Close the browser tab.
8. Import Store Settings
- You should have already downloaded and unzipped the “Store Settings” file.
- Click Import Store Settings on the getting started page.
- Click Choose File under Import Settings.
- On the Import page under Import Settings browse your computer and select the easy-digital-downloads.json file.
- Click Import.
- Close the browser tab.
9. Update Payment Settings
To edit the beat store settings click Settings under Beat Store on the sidebar.
- Click Update Payment Settings.
- Next to “Primary Checkout Page” select “Checkout“.
- Next to “Success Page” select “Purchase Confirmation“.
- Next to “Failed Transaction Page” select “Transaction Failed“.
- Next to “Purchase History Page” select “Purchase History“.
- Select your “Base Country” and “Base State / Province”.
- Click Save Changes.
- Click the “Currency” text link.
- Select your Currency and Currency Position.
- Click the Save Changes button.
- Click the “Payment Gateways” tab.
- Click the “PayPal Standard” text link.
- Next to “PayPal Email” enter your active PayPal email address.
- Click Save Changes.
- Click the “Emails” tab.
- Next to “From Name” enter your website name, producer name, or business name.
- Next to “From Email” enter your website address. An email address that includes your domain name is suggested.
- Click Save Changes.
- Click the Purchase Receipts text link. This is the email that is sent to your customers.
- Optional: Update the “Purchase Email Subject“, “Purchase Email Heading, and “Purchase Receipt email“.
- Then click Save Changes.
- Click the “New Sale Notifications” text link. This is the email that is sent to you.
- Optional: Update the Subject, Header, and Sales Notification email.
- Next to Sale Notification Emails add your email address.
- Click Save Changes.
- Click the Misc tab.
- Click the Terms of Agreement text link.
- Optional: Edit the Terms of Agreement settings. These terms appear on the beat store checkout page when enabled.
Payment Related Links
- PayPal Common Questions
- How to Do Test Payments
- Can I Use Other Payment Systems
- How to Edit Terms and Conditions
- Emails Not Sending
- PayPal Doesn’t Work
Have a Problem? Common Setup Issues >
5. Keep It Simple!
Simplify your website to avoid getting overwhelmed by decisions.
5 Beginner Tips
- Keep your website simple to avoid getting overwhelmed.
- Remove frontpage sections and menu links that you aren’t ready to focus on.
- If you hit a roadblock, take a note of it, and work on other sections in the meantime. You don’t have to stop progress. Search help website for answers.
- Take notes of all your ideas. Prioritize them and do them later.
- Be patient. Your website will get better with time.
6. Customize the Homepage
Here you will learn how to edit the Frontpage Sections Template.
Helpful Articles ( 7 )
- Frontpage Sections Template
- WordPress Customizer
- Appearance
- Header
- Navigation Menu
- Homepage Articles
- Widgets
Problem? Find Answers >
Next: Beat Player Appearance >
7. Beat Player Appearance
Learn how to customize the beat player frontend settings and appearance.
8. Slider Banners
Learn how to display homepage banners with multiple messages.
Click Smart Slider in WordPress to edit the slider banners.
9. Add First Beat
Learn about the different beat types, how to add beats, and test payments.
Beat Articles ( 12 )
- How to Add Beats
- Audio Player Doesn’t Work ( Download File )
- Beat Store Frequently Asked Questions (80+)
- Beat Store Overview
- Increase Upload Limit
- Checkout Page Doesn’t Work
- Include Contracts with Beats
- Test Buying Process
- Create Discounts
- Reorder Beats
- Free Download Button Doesn’t Work
- Can I Accept Credit Cards?
Problem? Find Answers >
10. Pricing Table
The Pricing Table allows you to list multiple license details and different pricing options.
Edit by clicking Pricing Tables in WordPress.
11. Testimonials
The testimonials allow you to display multiple testimonials from happy customers and clients to help establish trust.
Edit testimonials by clicking Testimonials in WordPress.
12. Add Static Pages
Static pages are the main pages of your website like the About page, Services, or Contact Us.
- Product Store ( Digital & Physical )
- Contact Page
- Blog Posts
- Full-Width Template
- Photo Gallery
- Video Gallery
- Services Page
- FAQ Page
- And More…
13. Find Tutorials & Frequently Asked Questions
Help.MusicMakerTheme.com has over 200 help articles and Frequently Asked Questions. Support can take 24 to 48 hours.
6 Tips to Find Answers
- Search the Help Website to save time and avoid frustration.
- Visit All Articles Page
- Frequently Asked Questions
- Search Google.com
- Troubleshooting Articles
- Use the Help ( ? ) pop Up in WordPress.
14. What to Do Next
Here are suggestions on what to do next when setting up your website.
- Start Simple
- Research Your Competitors
- Add Content
- Track Website Visitors
- Search the Help Website
More Details ( 6 )
- Start Simple – Avoid focusing on too much so you don’t get overwhelmed.
- Research Your Competitors – Research other beat selling websites for inspiration.
- Add Content – Start adding the different content types.
- Track Visitors – Add code from services like Google Analytics to track visitors.
- Search the Help Website – Read articles and Frequently Asked Questions to get your website up and running.
- Planning a Website – Plan on paper.
15. SSL Certificate (Optional)
Learn how to add an SSL Certificate to your website with Bluehost.
Adding an SSL Certificate will make your website more secure and help your search engine rankings.
Bluehost: Add SSL Certificate
10 Tips to Sell Your First Beat
Here are 10 suggestions to help you sell your first beat. If you have already sold beats, these tips can help you sell more.
How to Sell Your First Beat
- Have 50+ Beats
- Put Best Beats First
- Follow Music Trends
- Simplify Your Website
- Negotiate Beat Prices
- Offer Discounts
- Create Helpful Content
- Build Trust
- Analyze Data
- Build Relationships
Common Setup Issues
Here are the top 10 common setup issues.
- License Activation Problems
- Missing Style.css Error
- Can’t Import Sample Content
- cURL Error
- Error: Sorry, You Are Not Allowed to Access This Page
- Audio Player Doesn’t Work ( Download File )
- Upload Limit Problems.
- Error: License Status is Unknown or cURL Error
- Beat Store Link is Missing ( Can’t Add Beats )
- Only 10 Beats Display
Problem? Find Answers >
I hope you find this course to be helpful.
For documentation on the Music Maker WordPress theme, visit Help.MusicMakerTheme.com.
If you are new to selling beats, check out How to Sell Beats Online.
Have course feedback? Leave a comment below.
We do NOT provide support through HipHopMakers.com. Please visit Help.MusicMakerTheme.com
Specific Terms & Conditions
- Free Domain Address – Offered by Bluehost when you sign up for a plan. Domain Policy
- $15 Off the Music Maker Theme – You can get $15 off our template when you sign up with Bluehost using our affiliate link. Discount Details
- 30 Day Money Back Guarantee is by Bluehost for their web hosting services. Refund Policy